Do you want to install the Renogy solar panels in your place? You have to follow a specific procedure to complete the process smoothly. You have to understand the process in the correct order to install the renogy solar panel.
Renogy Solar panels are heavier than they seem. You have to handle this with care. Otherwise, the solar panel can break. Check the aluminum mounting of the Z brackets of the solar panel kits.
These solar panel kits are very sturdy and light. In addition, some of the connecting wires are cheap and easy to use. You have to understand these facts while installing the renogy solar panels.
Step By Step Guide To Install Renogy Solar Panels
You have to follow specific ways to install the renogy solar panels. Maintain the steps properly to achieve your goals in the best possible manner. Work out your plans that can work well in your favor.
1. Place The Panels Correctly
First, you need to place the panels correctly on the roof of your building, and then you can fix the panels in the correct order. You can apply the following process to perform the task perfectly:-
- You have to first mount the aluminum z-brackets on the surface of the solar panels. After that, you can take the measurements of the solar panels to place the bolts on the roof of the building.
- Against the solar panel, you have to flush the brackets, which come with the set.
- After the Z brackets are placed in the correct order, you have to take the measurements of the end-to-end distance of the holes for mounting the solar panels on the top of the roof.
- You have to select the perfect position on the roof of your building from where you can get the direct sun rays on the solar panel to produce the electricity.
2. Clean The Roof
The second step is to find a suitable spot for placing the renogy solar panels on your roof. For that, you have to clean the roof correctly. Cleaning the roof properly will not allow the dirt to settle on the solar panel.
Sometimes, excessive dirt on the solar panels may not work correctly as they will not receive sunlight properly. Therefore, you have to make your choices in the right direction to achieve your goals.
3. Drill The Holes For The Wires
You have to fed the cables to the proper destination by drilling the holes for the wires. Next, you need to ensure that you have enough lines for getting the battery box where you want to set the solar charge controller.
You have to make the hole for the solar panel relatively large this will help you prevent the damage of the cable wires during the installation process. Ensure that you file the hole edges before you run the wiring.
It can reduce the chances of current and voltage loss to a great extent. You have to understand these facts before making the holes for the wires.
4. Mount The Panel Attachments
The next step is to mount the panel and its attachments in a series of parallel configurations. It depends entirely on the sun configuration. Finally, you have to follow particular passions to get things done in the correct order.
- You have to place the panel in the right direction and in an excellent series to bang your buck in the correct order.
- Then you need to expose the panel to maximum sunlight to ensure the highest power creation for your room.
- You must research this matter where the flip side of the solar panel can make things easier and more effective for you. You must not make your choices in grey.
5. Install The Panels
You have to install the panels by drilling the holes in your roof using a ¼’ inch drill bit. After that, you need to hit 16 spots where the bolts will hold the Z brackets of the panel. Then, finally, you need to clean around the holes.
After sealing, you must add the bolts and washers to each hole. And after that, you have to tighten each bolt to avoid the socket wrench lost on the roof.
After that, you have to seal the Z brackets completely. While attaching the roof renogy solar panels to your roof, you must consider these facts.
6. Wire The Panels To RV
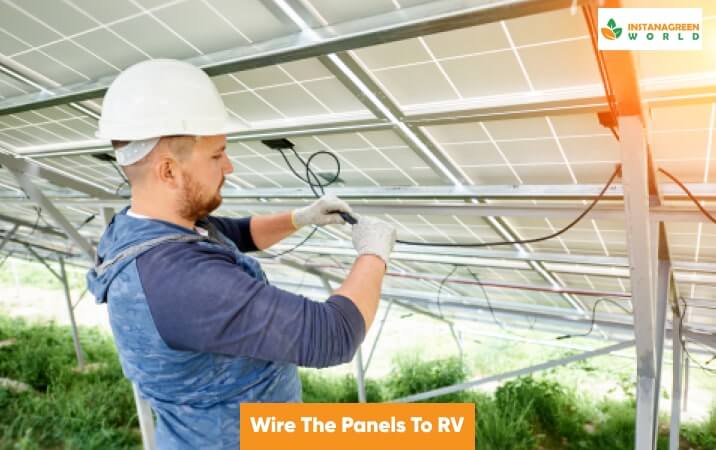
You have to wire the panels to the RV and then stretch the power supply of 12v to your room. Next, you have to wire the discussions in the RV. Do not make things more complicated for yourself.
You have to make things possible through your panels of RV to get the wiring from the solar panel attached to your room in the correct order. It will help you make things properly work in your favor.
You have to use the solar charge controller to control the solar panels in the right manner. Try to make the proper alignment with the solar panels to get things done in the correct order.
Why Demand For Solar Panels Are Increasing?
There are several reasons why the demand for renogy solar panels increases. You need to understand the facts correctly to achieve your goals in the best possible ways:-
- It reduces the chances of air pollution.
- It increases the chances of energy storage and utilization.
- Solar panels increase the chances of energy storage and repeated usage.
- It reduces the cost of your electricity consumption.
Final Take Away
Hence, you have to understand the facts in the correct direction to implement the renogy solar panels to make things work in your order. Therefore, work out your plans in the best possible manner. Try to make the correct selection of the place where you want to install your solar panels.
You can also share your thoughts, feelings, and opinions in this regard to get the maximum advantage from these installation processes. However, you need to know the facts before choosing to develop your solar panel installation for better energy saving.
Read Also:


