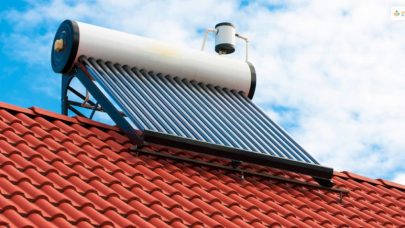
When solar panels are placed in direct sunlight, they operate at their best. That’s why solar on rooftops has become such a popular trend nowadays, both in factories and homes. It will ensure optimum performance if you can position your solar cells squarely beneath the noontime sun while installing your solar power system.
Take care of any sunlight impediments before installation. Remove any unwanted obstacles, such as branches that may be blocking sunshine to your solar unit. You should also track the sun’s movement in the sky to ensure that no item casts a shadow on your photovoltaic solar panels. Because of this shadow, the performance of your solar energy unit will drop, and there won’t be any point to install your solar on rooftops if that happens.
How To Install Solar On Rooftop?
A solar rooftop system is not an easy thing to partake because it requires a lot of technical knowledge and skill. If you know how to make a homemade solar light for home, you are already one step ahead in the game. Now, all you need to figure out is how to put the solar on rooftops because that requires some additional steps. Let’s take a look;
Step 1: Mount Installation
The first step is to assemble the mounts that will hold the roof solar panels. Roof-ground mounts or flush mounts might be used depending on the situation. This founding structure offers stability and support to your solar rooftop system. Make sure the orientation of the PV panels is carefully considered.
The ideal direction to put solar on rooftops in Northern Hemisphere nations is south since it receives the most sunshine. East and west directions are also acceptable. The ideal direction for countries in the Southern Hemisphere is north. The mounting framework must be followed carefully. Make sure the tilt angle ranges from 18 to 36 degrees.
Step 2: Assemble Solar Panels
We will attach the solar structure to the solar modules once it has been precisely fixed. We must guarantee that every solar panel’s nuts and bolts are securely fastened to the solar framework so that it is completely secure and long-lasting. The following step is to secure the solar panels to the mounting framework.
Tightening nuts and bolts carefully will help you assemble the solar panels from the scratch. If you use Vikram solar panel, you may not have too much to worry about. That’s because those panels ensure the entire construction is securely fastened to last much longer.
Step 3: Electrical Wiring
The next stage is to install solar on rooftops is to complete the electrical wiring. Any solar rooftop power plant will use universal connectors such as MC4 to connect to all types of solar panels. These connections are the best and may be used with any kind of solar panel.
Using MC4 connections simplifies and speeds up the wiring of a solar array too. So, for your solar rooftop project, you can use the same conductor. It will ensure your electrical wiring is up to date, and likely won’t result in a short circuit.
Step 4: Connect Solar Panel To Solar Inverter
The system will then be connected to a solar inverter. The positive wire from the solar panel is linked to the inverter’s Positive pole, while the negative wire is connected to the inverter’s Negative pole. To generate power, the solar inverter is linked to the solar chargers and the network input.
Other connections include the battery wiring and the output wire connection to the inverter. To generate power, a solar panel, a solar battery, and a grid input are all linked to a solar inverter. While connecting the wires, be sure the inverter is switched off; else your solar on rooftop project will shut down even before it starts.
Step 5: Connect Solar Inverter To Solar Battery
A battery is required in an off-grid solar system since it is utilized to store backup generators. This battery is linked to a solar inverter, which recharges it using a solar panel kit, and the grid. The battery’s positive terminal is linked to the inverter’s positive terminal, and vice versa.
You will always require a battery in an off-grid solar system to store backup power. The solar rooftop system won’t work out perfectly if you don’t use a solar rooftop calculator and measure the solar score. So, consider these suggestions too at this step.
Step 6: Connect Solar Inverter To The Grid
After that, connect the inverter to the power grid. You can utilize a standard plug to connect to the main power switchboard to accomplish this connection. An output wire should be linked to the electric board, which provides power to the dwelling. To connect the inverter to the grid, simply plug it into the main power switchboard and it will get electricity from the grid.
The output cable is also linked to the board that supplies power to the house to make a rooftop solar system for home. Install a metering device to determine the extra energy generated by the solar system. You must connect the positive wire to the line terminal of the metering device and the negative wire to the inverter’s neutral terminal.
Step 7: Start The Solar Inverter
Finally, you can turn on the main switch of your solar on rooftops when we’ve completed all of the connections. There is a digital display that indicates the total solar unit produced during the day, as well as the supply voltage and current from the solar panel, among other things.
When all of the electrical cabling and connections are complete, turn the inverter switch on the power button of the house. Most solar inverters will include a digital display that will show you statistics about your solar unit’s output and use.
Conclusion
In this article, we have shared enough details on the steps to install solar on rooftops. We have also shared intricate details on how solar lights work, and what the importance of solar inverters is. If you have any further questions on solar evaluation, you can let us know in the comment section below. We will get back to you with an answer.
Read Also:


